Simulation Set Up
Before going any further, it’s worthwhile to think about one of the most important parameters governing the simulation: maximum element size. This size will define the resolution of our simulation and will influence its accuracy and performance. The rule for selecting this size is simple in theory, but sometimes difficult in practice.
It should be smaller than the smallest feature in the geometry which we want to preserve through the simulation. In a lattice, for example, we want to ensure our struts are properly resolved, so we should choose our size to be smaller than the lattice strut diameter. Or if our body has holes in it, smaller than the diameter of the smallest hole. It can also be the distance between features, even if those features themselves are large. If a large hole leaves a small amount of material along an edge then the width of that narrow region will determine our maximum element size.
Choosing this element size can take a bit of trial and error. Too small and the simulation can take too long or consume too many resources. Too large and the accuracy of the solution will suffer.
Note
The ‘maximum element size’ parameter will heavily influence the performance and accuracy of the simulation. Geometry feature dimensions should be taken into account when selecting this value. 1/2 or 1/3 of a representative feature size is usually a good starting point.
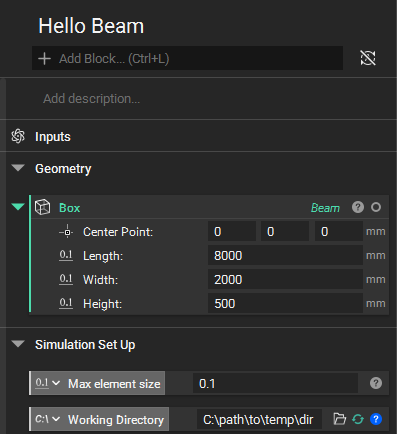
For our beam we don’t really have much issue here – it’s just a cuboid. But since it will influence other aspects of our simulation, let’s define it at this point in our notebook with a value of 0.1 m (we always use this parameter in units of meters). And while we’re getting things set up, let’s go ahead and specify a directory for Sileom Simulate to place temporary items.